Wednesday, March 16, 2022

 Whenever I walked in the bush in Australia I used to love seeing leaves with holes chewed in them, on the ground, or seeing a shiny beetle hiding in the leaves.

I have the dies called leaf fragments and Funky Insects by Tim Holtz so I made this card for my
Friend’s daughter who is house bound having chemo for a heart tumor that started very suddenly.
So far the chemo is winning.  I thought a touch of nature would cheer her. 
I used gold rub on on the leaves and made the papers for the leaves with Distress inks.
The beetle’s lacy back is cut from a gelli print scrap I made a couple of years ago.


Wednesday, April 28, 2021

Distress Tags


 I am currently taking online classes with  #TimHoltzCreativeChemistry101

Just wanted to share some of the tag creations as I make them.

I am learning so much and love the Distress Inks and products. 

Affects achieved from L to R.  Blending, Wrinkle Free and Brushless Watercolor. 


Perfect Pearls with Distress ink in Mini 
Mister and gold powder, Stamped image with Versamark and gold powder and water activation of ink. Wrinkle Free Distress with  Gold Perfect Pearls. 


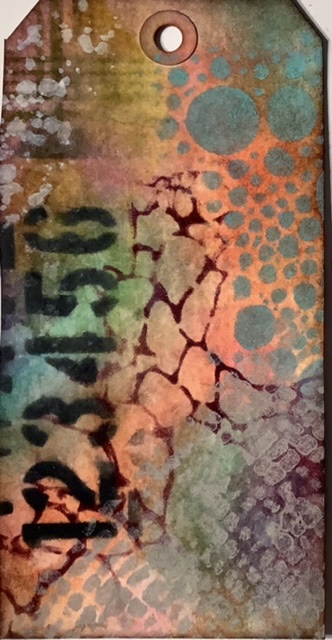
Crackle paste on die cuts  colored with Distress paint, Marbling with Distress Paint, Stamping resist with Distress paint  and Blended Distress inks BG.

Kraft Resist with Distress paints,


 Distress paint Marbling with Archival ink, Resist with Distress paint and direct to paper Distress BG


Alcohol Ink Agates, Archival Resist, Reflections Stamping. 

                     Layered Misting using a stencil, Water coloring with re-inkers and Aqua Brush 


From  LtoR Nostalgic Batik Technique, Rusted Enamel Technique, Distress Powder Resist Technique.

I have had the Distress Embossing Powders for a while but as the Fiddler fern tag proves you have to know the subtle hints to use them to their best advantage.  Shake the powder well.  Use Distress Embossing ink, after tipping off powder do not flick the card stock  before heating. Let the image dry after heating then using your hand rub off the release crystals.
Use Distress inks and blending brushes to highlight the image.  When happy with the result rub over with a cloth and see the happy result. Look how the fern seems to have a halo of light around it. 

Layering with inks and Stencils.  

Old Paper Distress Stickles 


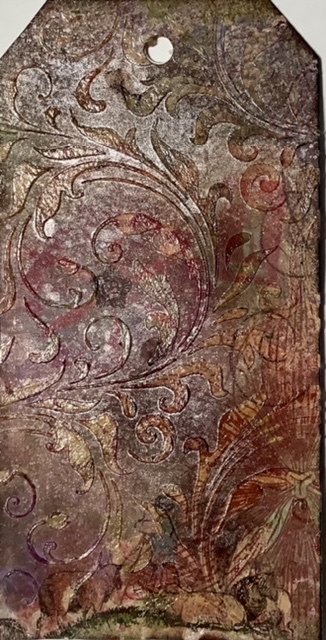
Industrial Embossing, Stamping through a stencil, embossing through a stencil.


Stencil Sketch, Ink Monoprint with stencils Distress Paint Monoprint with stencils.


Alcohol Ink Monoprint

Alcohol inks Faded Layers Technique


Distress Glittering

.


Alcohol Ink Ombré 


Shabby Chic


Rusting with Distress Embossing  Powder


Rub on resist with Distress sprays Wilted Violet, 
Picked Raspberry and Prize Ribbon. 

This was supposed to be Airbrish with Distree Markers but 
I don’t own either so I used Brushos.


Translucent paste and Flourish stencil with Spray stains, 
Antique Bronze, Picked Raspbery, Cracked Pistachio, Wilted Violet.

        
Wrinkle Free Distress using ink Pads, Peacock Feathers, Aged Mahogony, 
Spiced Marmalade,
 Mustard Seed, Evergreen Bough.& Mica Spray. 


 Opaque Embossing Paste through Stencils and Distress Stain Sprays,
 Wilted Violet, Spiced Marmalade Oxide, Cracked Pistachio. 

Rusted effect around a collage,
I used a large Tim Holtz Paper doll image. 
Embossed a Kraft tag using Bead board EF.
Used paper strip scraps to make a bench and wallpaper behind him.
 Tapped TH Grit-Paste around the edges- let Dry. 
Used Distress Crayons in Vintage Photo and Walnut stain 
and rubbed on with my finger to create a rusted grungy look over the grit paste. 

Here are my tags using Distress Crayons.


Distress Crayons Gesso Fresco


Distress crayon Smudge


Distress Crayon Layered Coloring


Distress Crayon Layered Background


Distress Crayon Watercolor Resist


Distress Washed Watercolor
Using micro glaze, spray stains, iced spruce, prize ribbon, 
Broken china and frayed burlap.


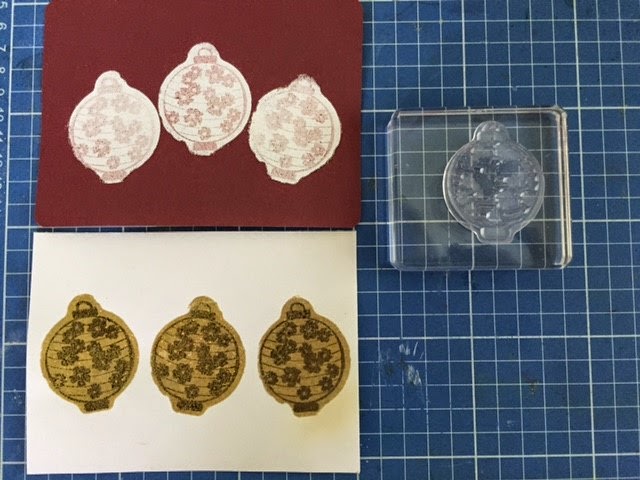
Faux cracked glass using Versamak and Utee 


Tuesday, November 1, 2016

Autumn is Here

This is my first post in many months and since I haven't had a lot of time for making new cards
I will share some older cards that I haven't shared before. This is one I made when trying  a technique,  new to me called Pointillism.  Today when I went for my walk hundreds of leaves were falling all it once. It was as if it was raining leaves.  I almost felt sad that they will all soon be gone except I remembered they will be back in spring.


Here is a gate fold  with a die cut opening.  I wanted to use my new leaf
stamp set called Gently Falling. It uses a scallop frame die cut that is retired.


The next card is a favorite of mine from a few years ago where I stamped the image twice and colored the leaves with chalk. Then I hand cut a stem to join them.
The last one is the only new card I made this Fall using one my Puffy Pinwheel teabag fold.
I hope you enjoyed my little gallery of Fall cards.
Enjoy your own creations wherever you are.


Thursday, May 14, 2015

Repair and re-cycle All at the Same Time - Un- Mounted Rubber Stamps

Yesterday I was assembling a set of clear mount stamps,the peel-off piece from the back of the stamp (which I usually discard) looked large enough for me to fix one that had torn on another stamp which has a sticky back.

So I placed the new piece over it.
traced around the outline
then cut out the new piece.
Last step was to place the new piece on the stamp.
Easy Peasy.
 
Now I save all my larger pieces of backing for who knows what other handy solutions.
 

Thursday, March 19, 2015

Think of the back side of a clear stamp as a bonus image!


To stamp a solid design (say a lantern shape), ink the back side of a clear mount stamp that has a definite shape, then heat emboss. To enhance it even further, ink the detailed side of the  lantern with a darker ink and  stamp  into the embossing powder while still warm to create a slightly indented design with a solid mat.  This technique can be used with any closely cut clear stamp. Just think of the back side of the stamp as a bonus image especially if you don’t have many solid image stamps.
I tried with gold embossing powder and black overstamp and white embossing powder and Razzleberry overstamp.

I used the resulting images for a card. I chose the gold and black  and fussy cut them out.  I added eyelets to the handle part and strung gold chord.

 I used black cardstock as the base.  Then some washi paper. Then a strip of Chinese red cardstock to highlight the lanterns.
Finished Card


Wednesday, June 4, 2014

Organizing Your Rubber Stamps


I know there must be a million ways to organize stamps so that putting your
hand on the right stamp right away saves time and frustration. Initially it does take some time to do what I am about to describe but the benefits are well worth the effort.
I had all my miscellaneous stamps in loose categories in plastic storage cart drawers that I would have to dig through to find the right one. I took them all out onto a long trestle table to sort them.

I didn't want to spend a lot so I sorted them into shirt box lids that I could layer them two deep in a drawer. To view the whole contents of the drawer I can just lift out the cardboard trays (carefully as they can collapse,) and then I can see at a glance all I have in that category. I also took photographs of each tray to store on my computer. Now I can sit at my computer and browse through all my stamps without even opening a a drawer.


This step saved me hours of stamping each one onto pages for a three ring binder. I decided it would also use too much printing ink to print out the photos so that’s the reason that I just view them on the computer When I find the one I want I can just go to the labeled drawer. Yes ,the small label printer from Office Supply got all my drawers organized with easy to view content labels.


For my Stampin Up Sets I did make a three ring binder by photo copying the front index pictures of my clear mount stamps and for the wooden sets it is easy to download an index image from Splitcoaststampers.com They have every StampinUp set with an index card and ideas gallery. You look them up by Alphabet. I also made an alphabetic Index of all the sets I own for the front of this 3 ring binder and also a section for all the word stamps for every set. Now I can browse through this album for the right image or quote without having to open stamp sets to see what they contain.
I have all the clear boxes stored in Alphabetical order on my bookshelf. My girlfriend and I have been to a lot of used stamps sales in the last couple of years so my collection has grown exponentially. I think we fit the definition of "she that dies with the most stamps wins.


Have fun re-organizing and let me know if you have a similar system or a better one.
Aloha.
Suzanne