Make Your Own Oriental Design Paper
Supplies:
- Mini Brayers or Rubber Brayer
- Brilliance inks (assorted shades)
- Oriental Stamps (small designs)
- Plain sheet 81/2 11 paper
- White cardstock
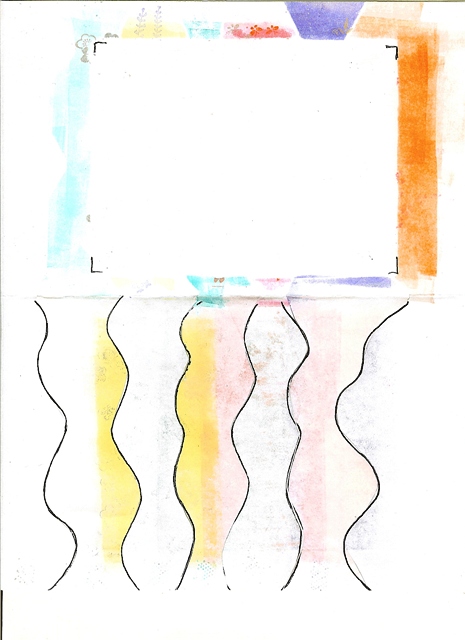
Masking Paper:
Fold the sheet of paper in half, Free hand draw
Approx. six evenly spaced wavy lines and cut each one
up to the center of the page.
Place half a sheet of white cardstock on the top half of the page and close the cut strips of paper over it. Ink your brayer with the first shade of Brilliance ink and open the first strip of paper and brayer the cardstock underneath, Close the strip of paper and open the next one, brayer the next color and close the strip and continue across the page until you have colored all the cardstock.You can use mini brayers, one for each color or use just the end of a large rubber brayer and run the color off between each application.
The next step is to use your gold, silver and copper inks
And using the masking strips again stamp your chosen designs on each strip of color.
Use the following grid as a guide for colors and stamp choices.
Click on the picture to enlarge.
Here is a card made from the results.
You can try endless combinations of inks and stamps.
I’ll look forward to your results.
Please leave a comment below with a link to your artwork and have fun creating.


